
How to Give Yourself a Subcutaneous Injection: A Step-by-Step Guide

  • Home
  • How to Give Yourself a Subcutaneous Injection: A Step-by-Step Guide
Shape1
Shape2
How to Give Yourself a Subcutaneous Injection: A Step-by-Step Guide

If your prescription arrives as a vial with a box of small syringes, that first injection can feel like a big deal. It isn’t. A subcutaneous injection is one of the simplest ways to take medication at home, and after a few rounds it becomes routine.

This guide walks you through every step, from unpacking your shipment to tossing the used needle. Keep it open the first few times you inject.

What Is a Subcutaneous Injection?

A subcutaneous injection (you’ll also see it written as SQ or SubQ) delivers medication into the layer of fat just beneath your skin, above the muscle. The needle is short and thin, and it’s a convenient, effective way to take many medications at home.

The most common injection sites are the abdomen, the upper thighs, and the upper arms.

Before You Get Started

Get familiar with everything in your package before your first dose. Read your prescription label, confirm the medication name, and note your dose. If your provider gave you instructions that differ from this guide, follow your provider.

Step 1: Gather Your Medication and Supplies

Set everything out on a clean surface before you begin:

  • Your medication vial
  • Insulin syringes with needles
  • Alcohol wipes
  • A sharps container, or a heavy-duty plastic container with a screw-on lid (an empty laundry detergent bottle works)

If your medication comes as a powder, you’ll also need a mixing syringe and the diluent provided with it.
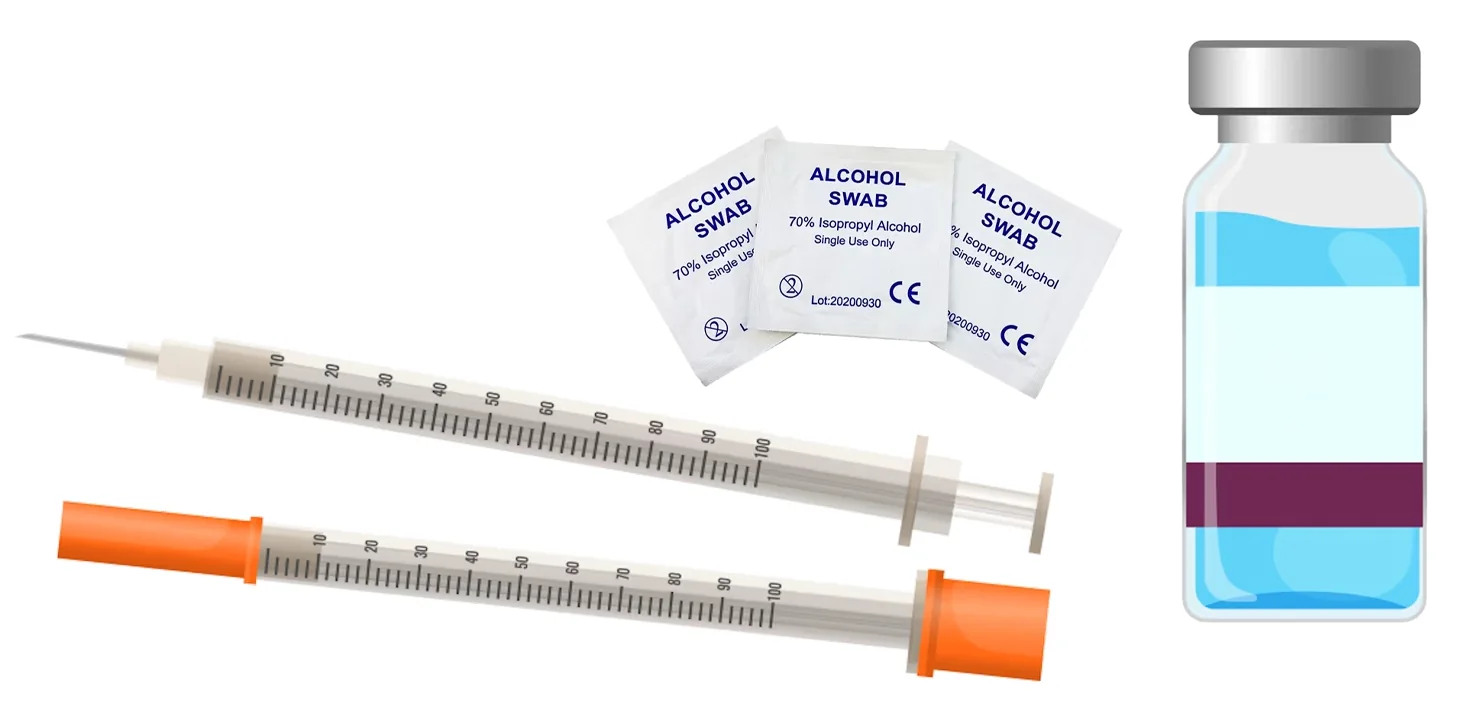
Injection supplies: two insulin syringes, alcohol swabs, and a medication vial
Everything you need: syringes, alcohol swabs, and your medication vial.

Step 2: Get to Know Your Syringe

Subcutaneous injections use an insulin syringe marked in units. Those unit markings let you measure very small amounts of liquid precisely. Here’s what each part does:
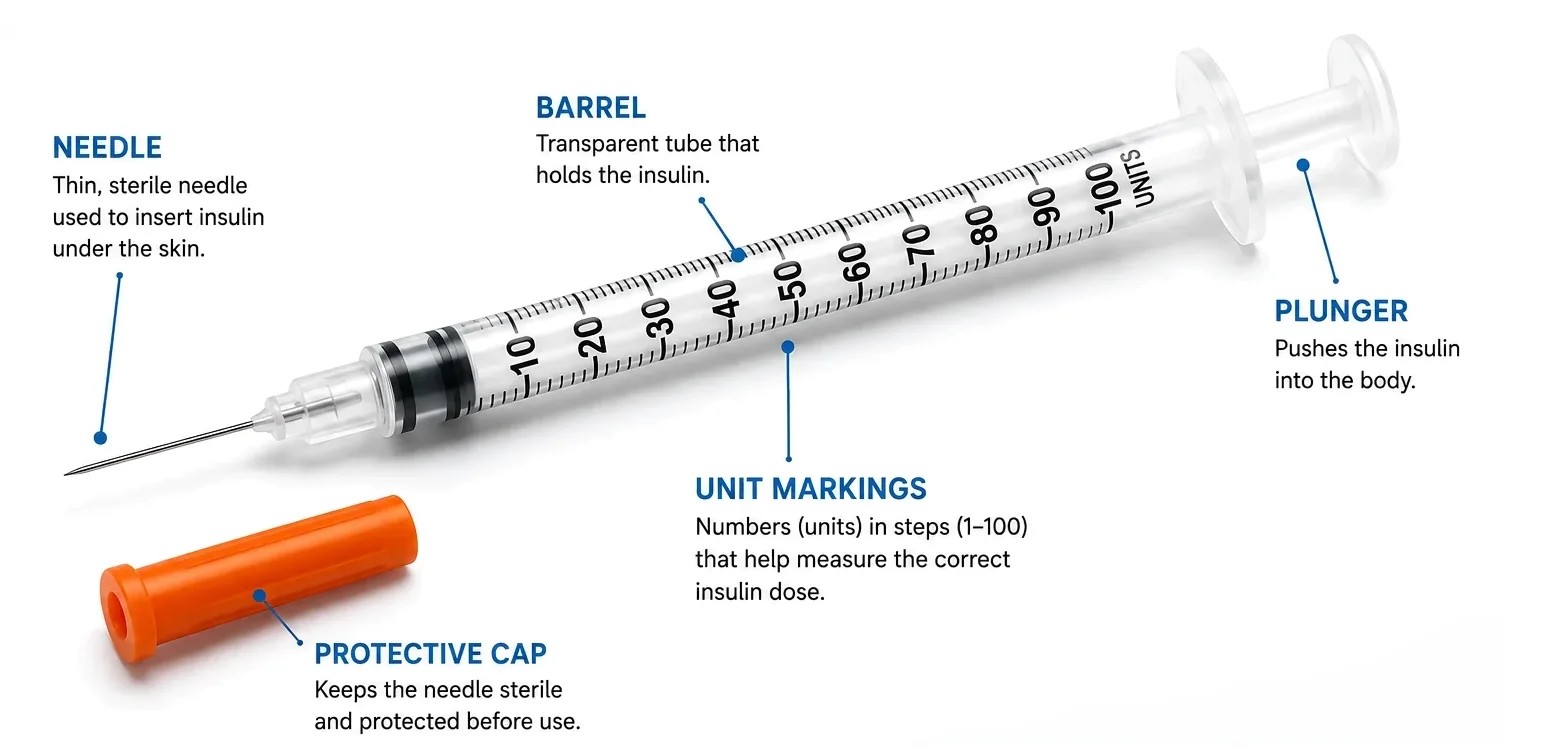
  • Needle: thin and sterile, it goes just under the skin.
  • Barrel: the clear tube that holds the medication.
  • Unit markings: the numbers on the barrel you’ll use to measure your dose.
  • Plunger: pushes the medication out of the syringe.
  • Protective cap: keeps the needle sterile until you’re ready.
Labeled insulin syringe showing the needle, barrel, unit markings, plunger, and protective cap
The parts of an insulin syringe.

Needle gauge: a higher gauge number means a thinner needle.

Needle length: varies by preference and body composition. A common example is a 30-gauge, 5/16-inch needle.

How to Measure Your Dose: Units to mL

Your prescription may list your dose in milliliters (mL), in units, or both. On a standard 1 mL insulin syringe, 100 units equals 1 mL, so every 10 units on the barrel is 0.1 mL.

Units mL
10 units 0.1 mL
20 units 0.2 mL
30 units 0.3 mL
40 units 0.4 mL
50 units 0.5 mL
60 units 0.6 mL
70 units 0.7 mL
80 units 0.8 mL
90 units 0.9 mL
100 units 1.0 mL

If your label and this chart ever seem to disagree, stop and message your provider before you inject.

Step 3: Prepare the Injection Site

  • Wash your hands thoroughly with soap and water.
  • Choose your site: abdomen, upper thigh, or upper arm.
  • Clean the spot with an alcohol wipe and let it air dry.

Tip: rotate your injection site each time. On the abdomen, stay about two inches away from your belly button.
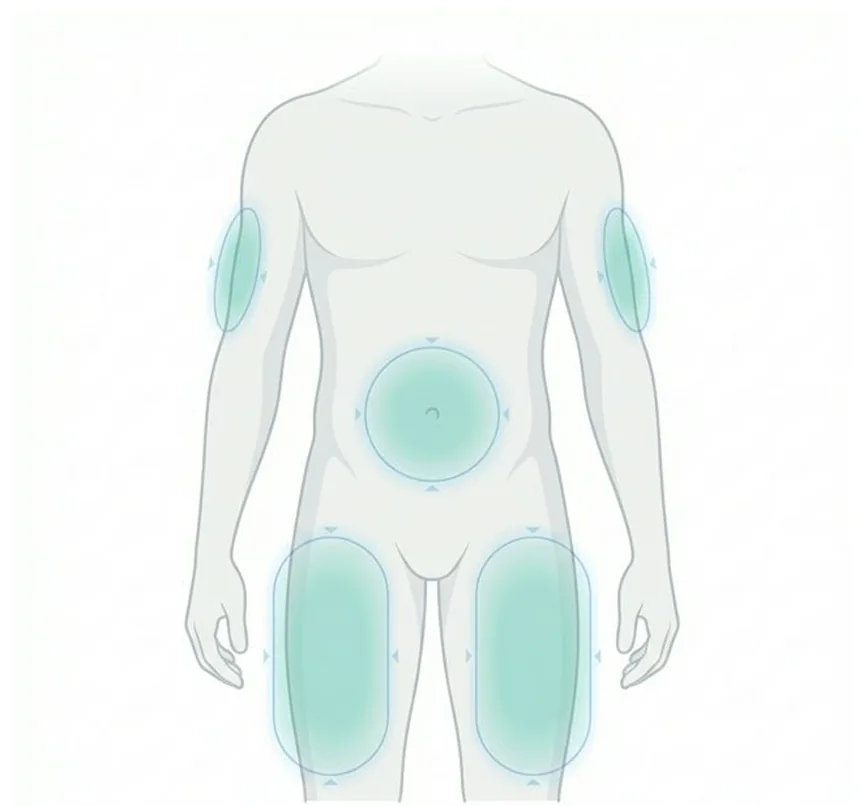
Body diagram highlighting subcutaneous injection sites on the abdomen, upper thighs, and upper arms
Common injection sites: abdomen, upper thighs, and upper arms.

Step 4: Prepare Your Medication

  • Let refrigerated medication come to room temperature first. Cold medication tends to sting more.
  • Make sure it’s the correct medication and that it’s not past its expiration date or Beyond Use Date (BUD).
  • If your medication is a powder, mix it using the mixing syringe and the diluent provided.
  • Confirm your dose on the prescription label.

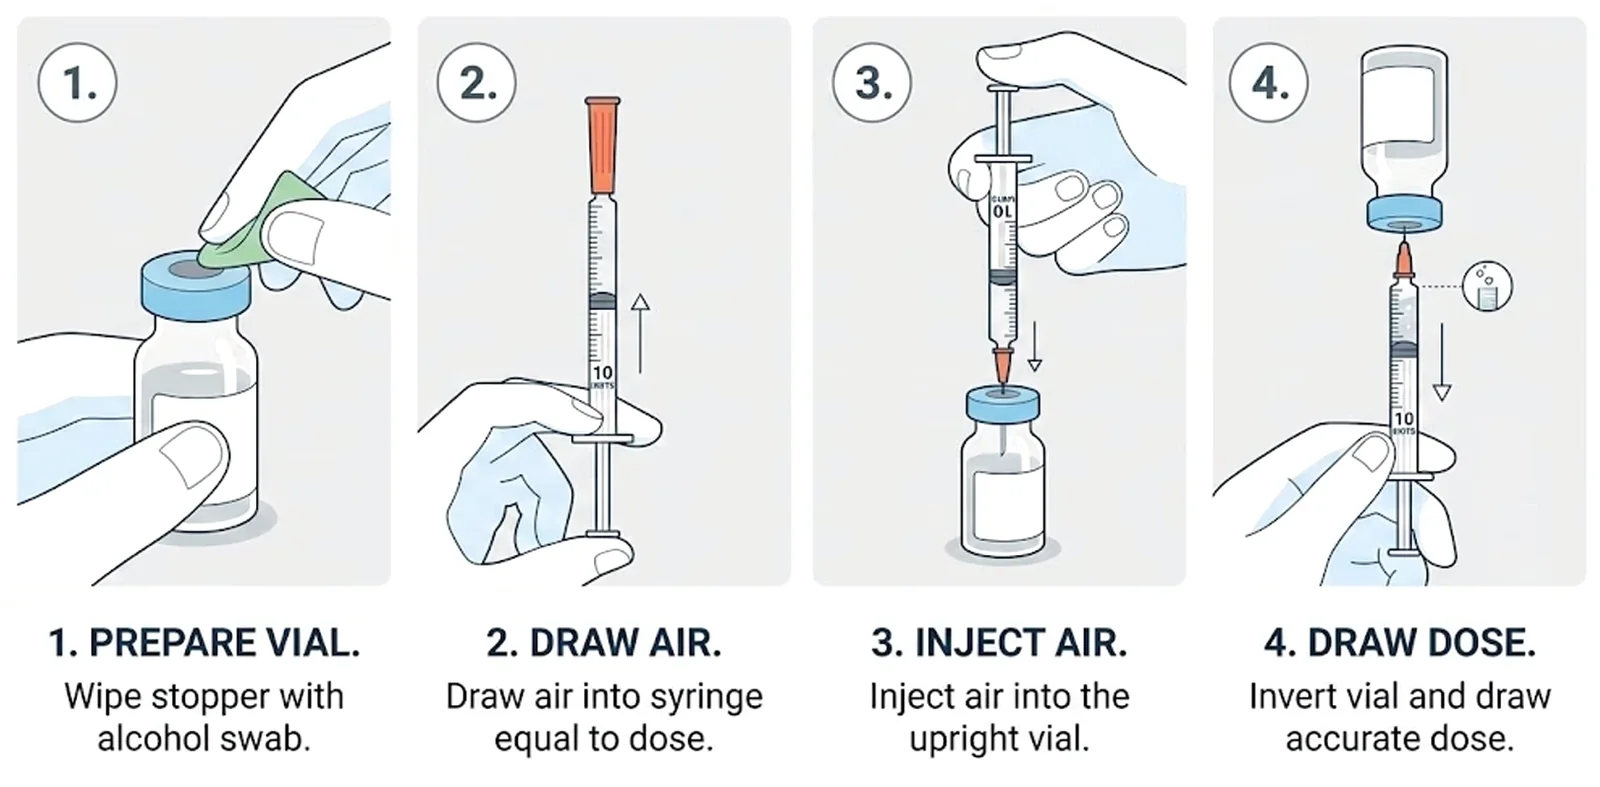
Step 5: Draw the Medication From the Vial

  1. Flip off the vial cap to expose the gray rubber stopper.
  2. Wipe the top of the stopper with an alcohol pad.
  3. Pull the plunger back to draw air into the syringe equal to your dose.
  4. With the vial upright, insert the needle straight through the stopper at a 90-degree angle and push the air into the vial.
  5. Turn the vial upside down, keep the needle tip in the liquid, and gently pull back the plunger to draw your prescribed amount.
  6. Tap the syringe gently so any air bubbles rise to the top, then push them out.
  7. Adjust to your exact prescribed dose and check the syringe one more time for accuracy.
Four steps to draw medication from a vial: prepare vial, draw air, inject air, draw dose
Prepare the vial, draw air, inject air, then draw your dose.

Step 6: Give the Injection

  1. Pinch a fold of skin at the site you cleaned.
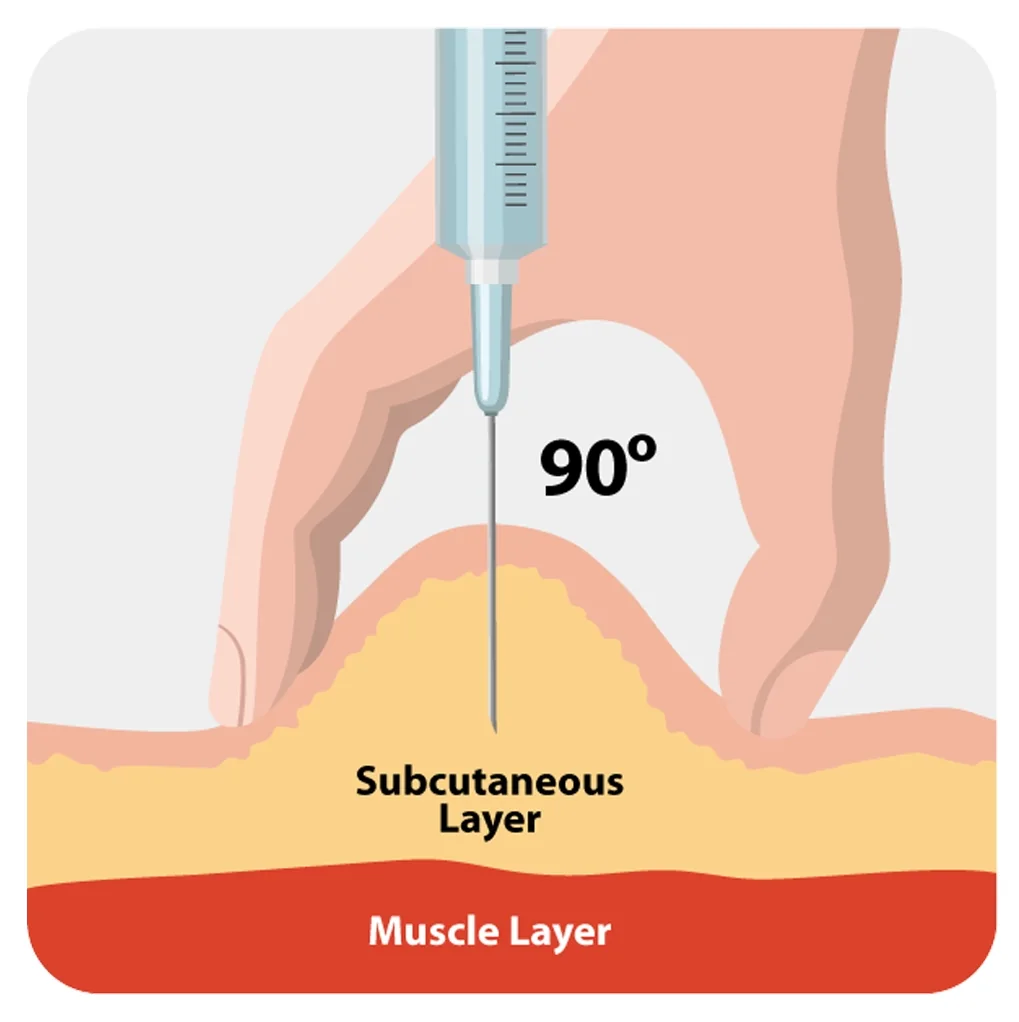
  2. Insert the needle at a 90-degree angle, or at a slight 45-degree angle if there’s less fat at the site.
  3. Once the needle is in, release the skin.
  4. Push the plunger slowly. Going slow keeps it more comfortable.
  5. Pull the needle straight out and apply gentle pressure with a clean cotton ball or gauze.
Diagram of a needle inserted at 90 degrees into pinched skin, reaching the subcutaneous fat layer above the muscle
The needle goes into the fat layer, not the muscle.

Step 7: Clean Up

  • Drop the used syringe straight into your sharps container. Don’t recap it.
  • Wash your hands.
  • Store your vial according to the instructions on the label.

Shipping and Storage: Your Medication Needs to Stay Cool

Your medication requires refrigeration, and it ships in a package designed to keep it cool in transit. If the ice packs have melted or the medication arrives warm, that does not necessarily mean the medication has been compromised. Put it in the refrigerator as soon as possible.
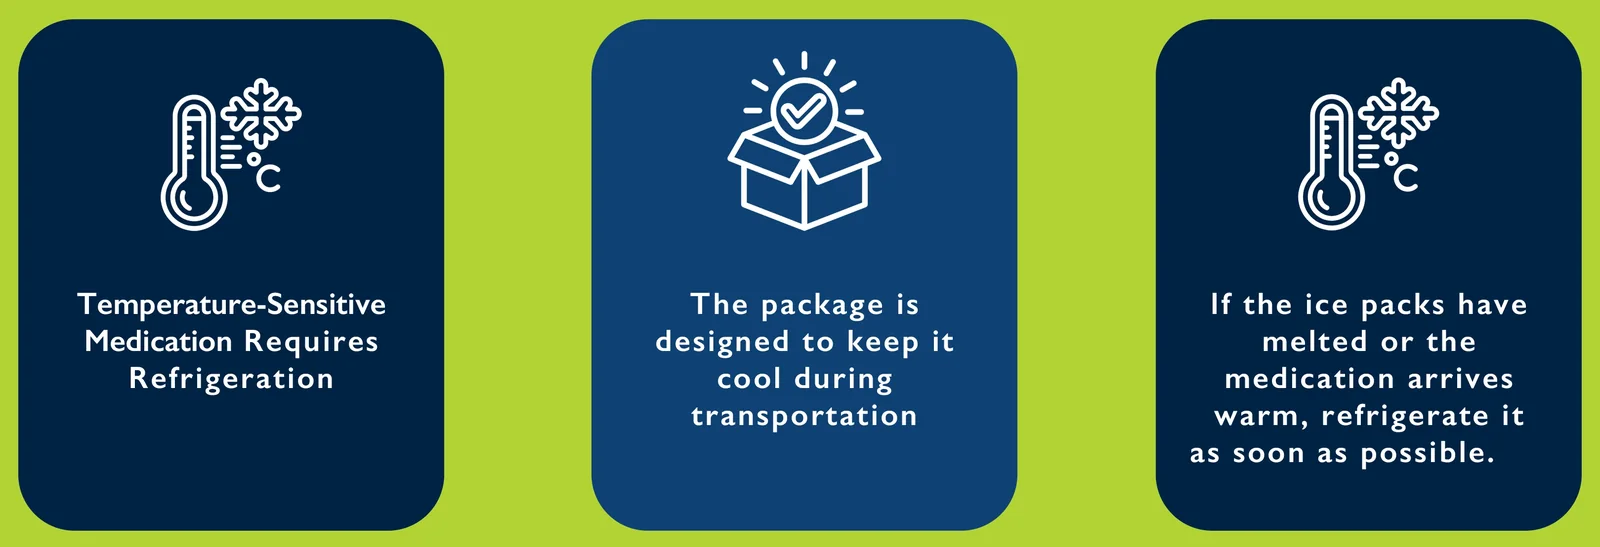
Temperature-sensitive medication requires refrigeration and ships in a cooled package
Refrigerate your medication as soon as it arrives.

What’s Normal and When to Get Help

Some reaction at the injection site is normal: mild irritation, redness, slight burning, swelling, or a small hard bump. Oil-based injections can stay at the injection site for several days. Contact your provider if symptoms get worse.

Get medical attention right away if you notice signs of an allergic reaction, including:

  • Trouble breathing
  • A rash across your body
  • Swelling of the face or throat

If you’re having trouble breathing or your throat is swelling, call 911.

Questions? We’re Here to Help

If anything about your dose, your syringe, or your injection site doesn’t feel right, message your care team through the Healthy Living Clinic patient portal. That’s what we’re here for.

This guide is for general education and does not replace the instructions from your prescribing provider. Always follow the directions on your prescription label.

Leave a Reply

Your email address will not be published. Required fields are marked *